
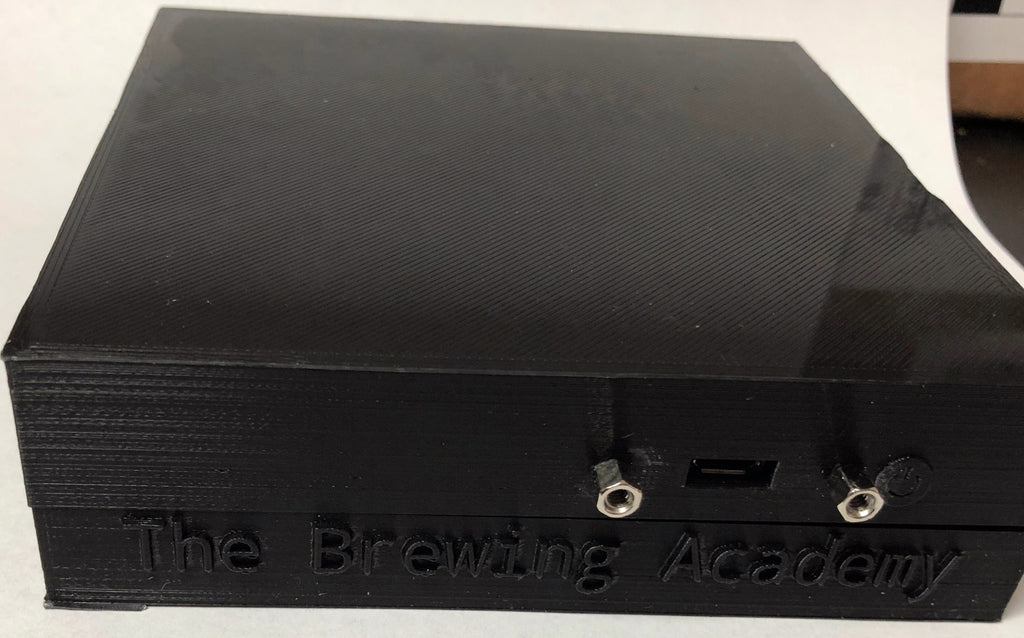
The Brewing Academy
The XEP80-II System is an improved reproduction of the original Atari XEP80 - 80 column video adapter. Atari's version suffered from extreme over scan that although viewable on the computer CRT displays of the era, no longer rendered correctly on more modern LCD monitors. So the first order of business was to solve the over scan issue, which thanks to Avery Lee of Altirra Emulator fame, came in the form of new improved display timing parameters, which were further tinkered with to yield a very usable display. These new custom NTSC display parameters are flashed into the firmware ROM of the XEP80-II, enabling it to use the entire 240 line horizontal resolution to render full descenders upon power-up (requires Over Scan to be disabled in the HDTV configuration - sometimes called full or raw scan mode (newer TVs might not use over scan so no change necessary).
XEP80-II by MyTek
Regular price
$45.00
Shipping calculated at checkout.
New from MyTek is the XEP80-II!
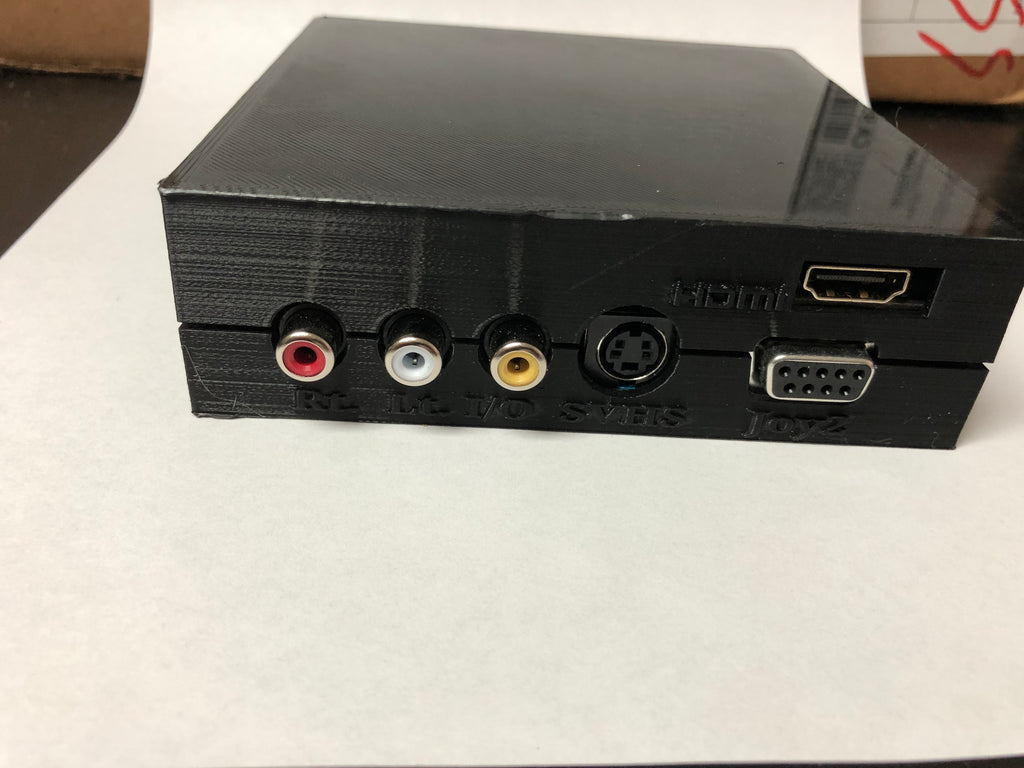
This will allow you to use an 80 column mode WITHOUT a VBXE! It will also give you HDMI out in both 40 col (standard) and 80 column mode!
Video of it in action: https://youtu.be/vyAx2GCeHVI
These are build to order, so please expect 5-10 *business days* before shipping
We have four versions:
DIY "Kit": This is a bare motherboard, with the 48 pin socket soldered on and the NS405 inserted into the socket. The NS405 has been tested. Bill of Materials (BOM) for the rest of the parts link can also be found here
Assembled: This is a fully assembled and tested XEP80-II. It does NOT include a case. This is for those of you that want to make your own case, buy a case from someone else, and/or just love to look at naked circuitry!
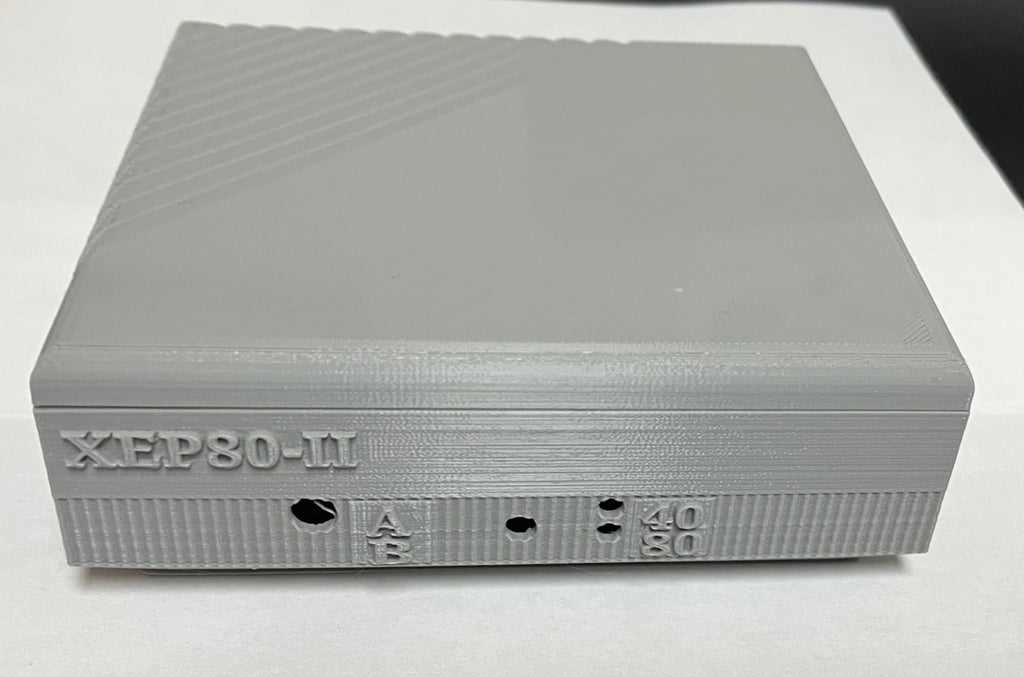
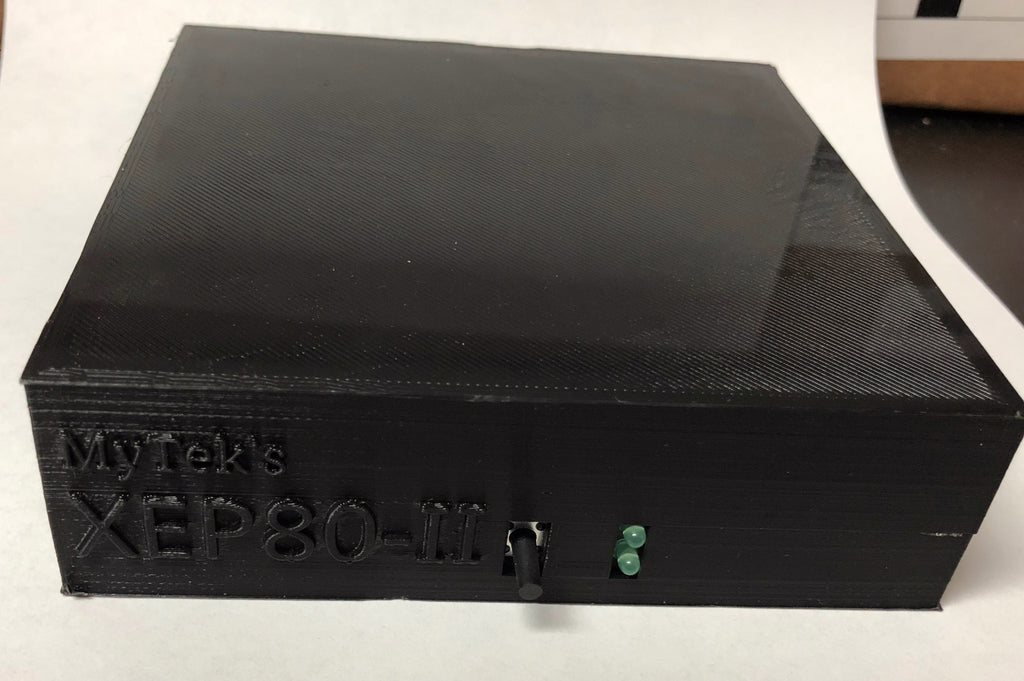
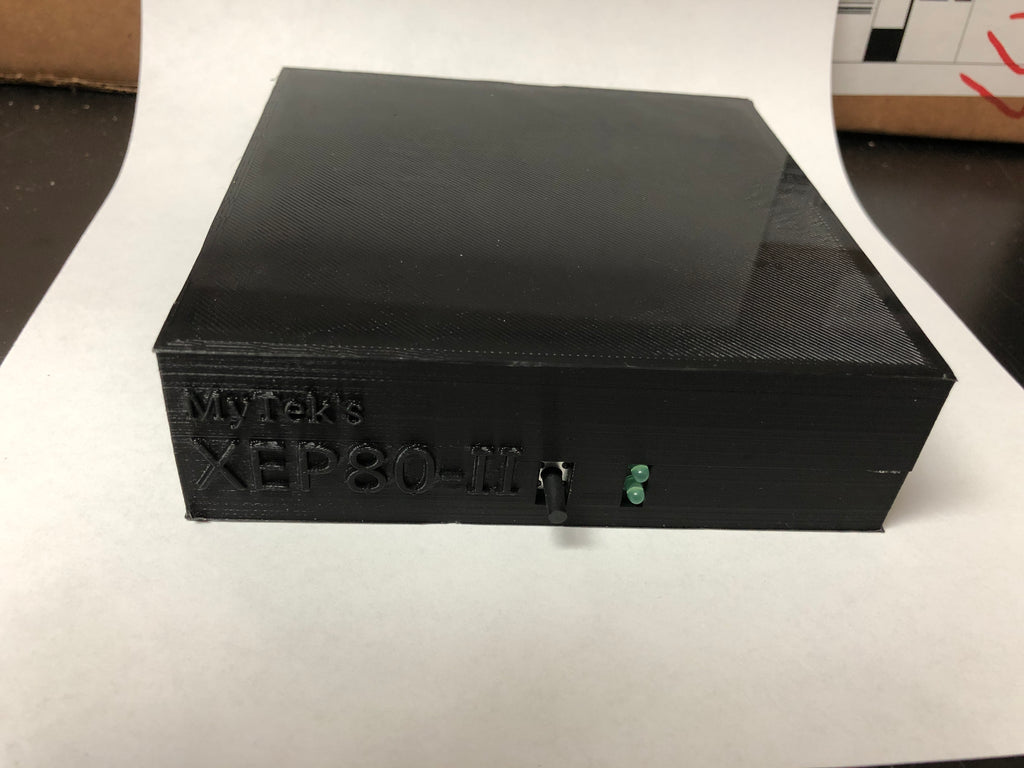
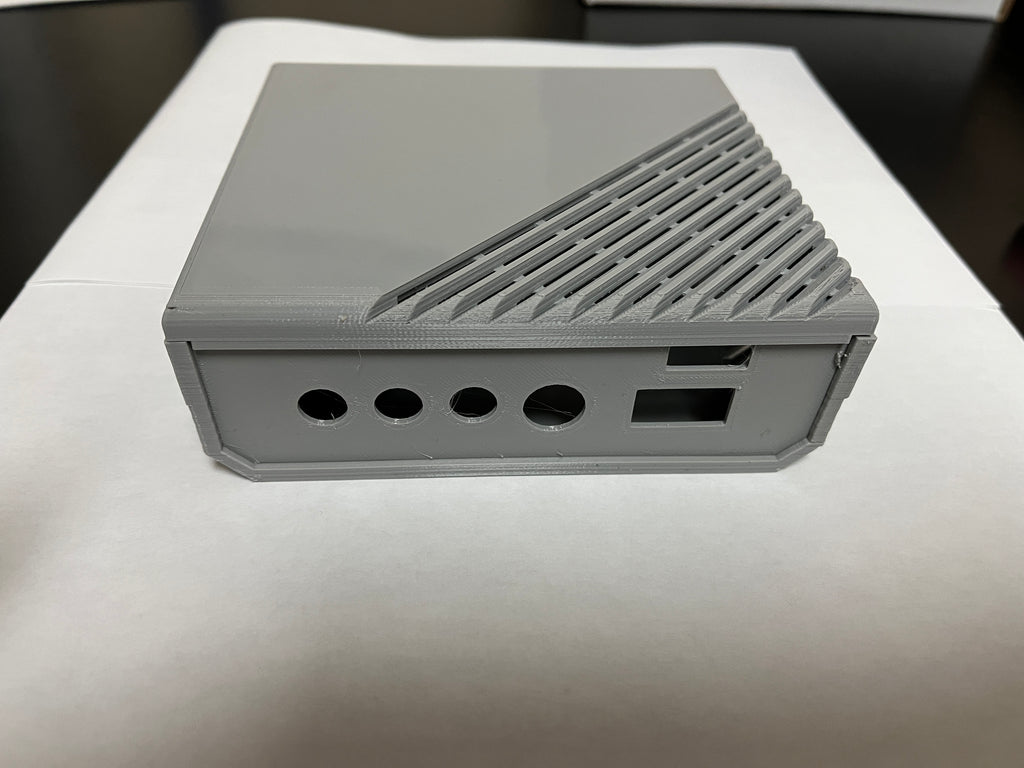
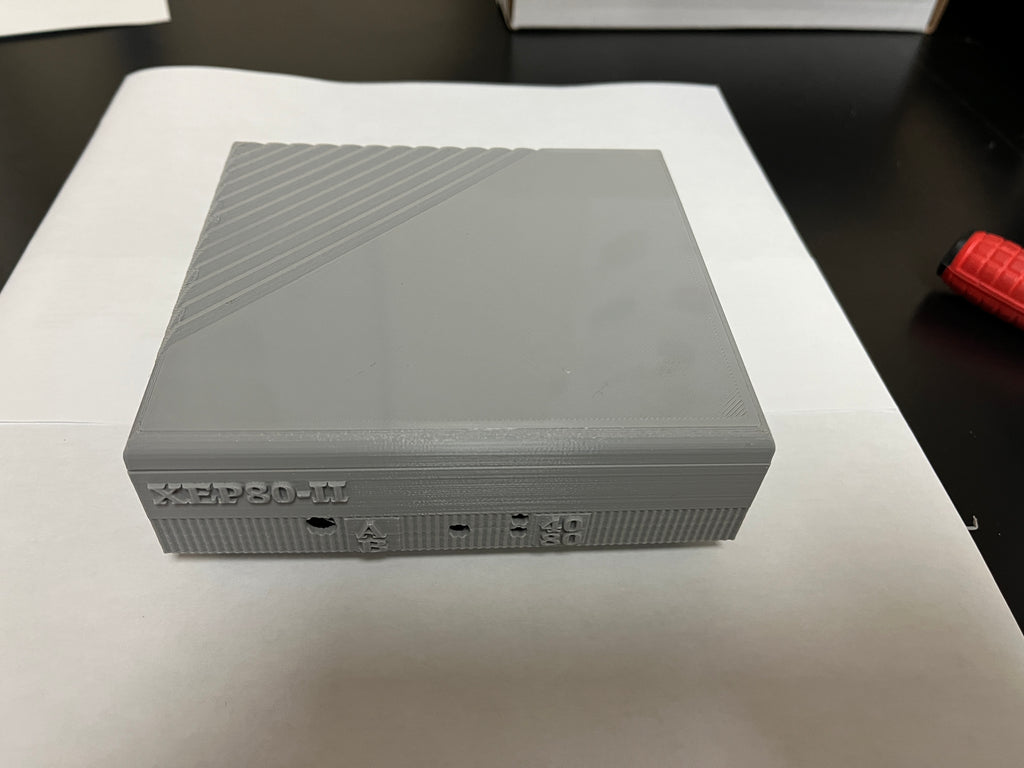
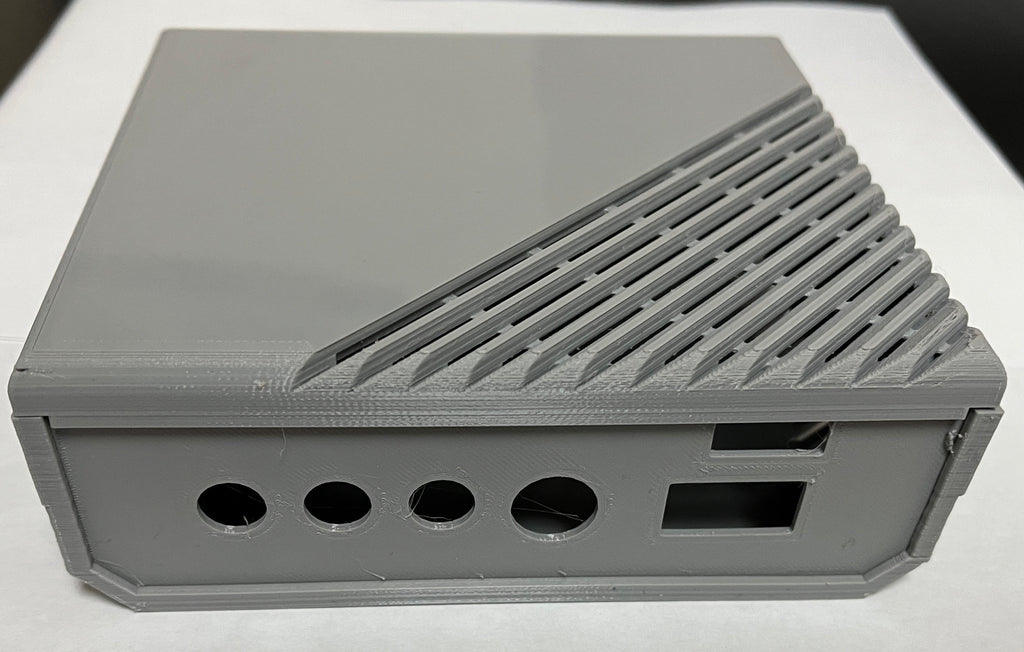
Complete: This is a fully assembled and tested unit enclosed in a case. Going forward, all units will be shipped in a gray XE style case that matches the 576NUC+ vase design. Black cases are available by special request.
CASE ONLY: This is the case that complements the 576NUC+ XE case design.
From MyTek's website:

ATARI 40 COLUMN VIDEO OUTPUT via HDMI
|
40 or 80 COLUMN VIDEO

VIEWED ON A SINGLE MONITOR
|
XEP80-II 80 COLUMN VIDEO OUTPUT via HDMI
|
The XEP80-II System is an improved reproduction of the original Atari XEP80 - 80 column video adapter. Atari's version suffered from extreme over scan that although viewable on the computer CRT displays of the era, no longer rendered correctly on more modern LCD monitors. So the first order of business was to solve the over scan issue, which thanks to Avery Lee of Altirra Emulator fame, came in the form of new improved display timing parameters, which were further tinkered with to yield a very usable display. These new custom NTSC display parameters are flashed into the firmware ROM of the XEP80-II, enabling it to use the entire 240 line horizontal resolution to render full descenders upon power-up (requires Over Scan to be disabled in the HDTV configuration - sometimes called full or raw scan mode (newer TVs might not use over scan so no change necessary).
|
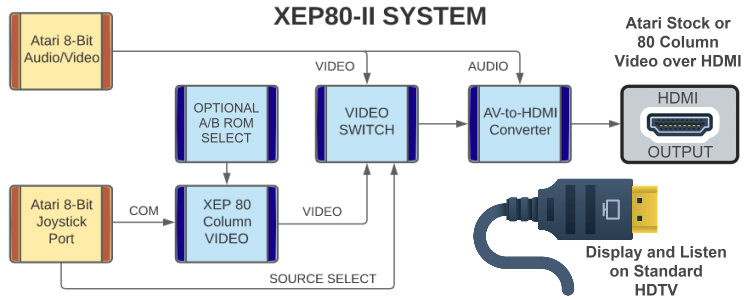
Next up was how to take the 80 column composite video output and allow it to be viewed on an HDTV, which are now the more common displays being used in almost every home. Through some experimentation, it was found that an inexpensive AV-to-HDMI converter could be used for this purpose, producing a very clear and legible text display. This was then incorporated into the overall hardware design as a daughter board, thus standardizing the video output for modern displays.
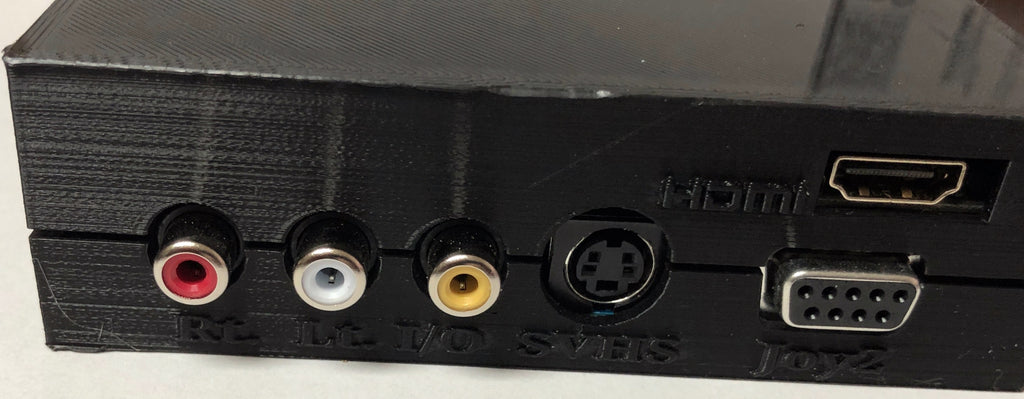
And by utilizing the same AV-to-HDMI converter for either video signal (Atari stock or 80 column text mode), this eliminated the necessity of having two separate monitors. Thereby allowing the two video sources to feed a common HDMI monitor (HDTV). In order to make this happen, a video switch was added that was controllable by either a manual push button, or via a couple of extra signals on joystick port2 for automatic operation. The selected video signal is then up converted and the Atari's audio as either mono or stereo is added to that HDMI stream, which can be viewed and listened to on a standard HDTV. |
|
What the new XEP80-II doesn't share with its older self, is the built-in parallel printer port. The decision to leave it out was two fold, one being that the new Altirra XEP80 drivers didn't support it out of the box, and the other because in this day and age of much better printer solutions it simply isn't needed. There is also a 3rd benefit, which is to leave more memory free for whatever application is to be run alongside the new improved 80 column drivers.
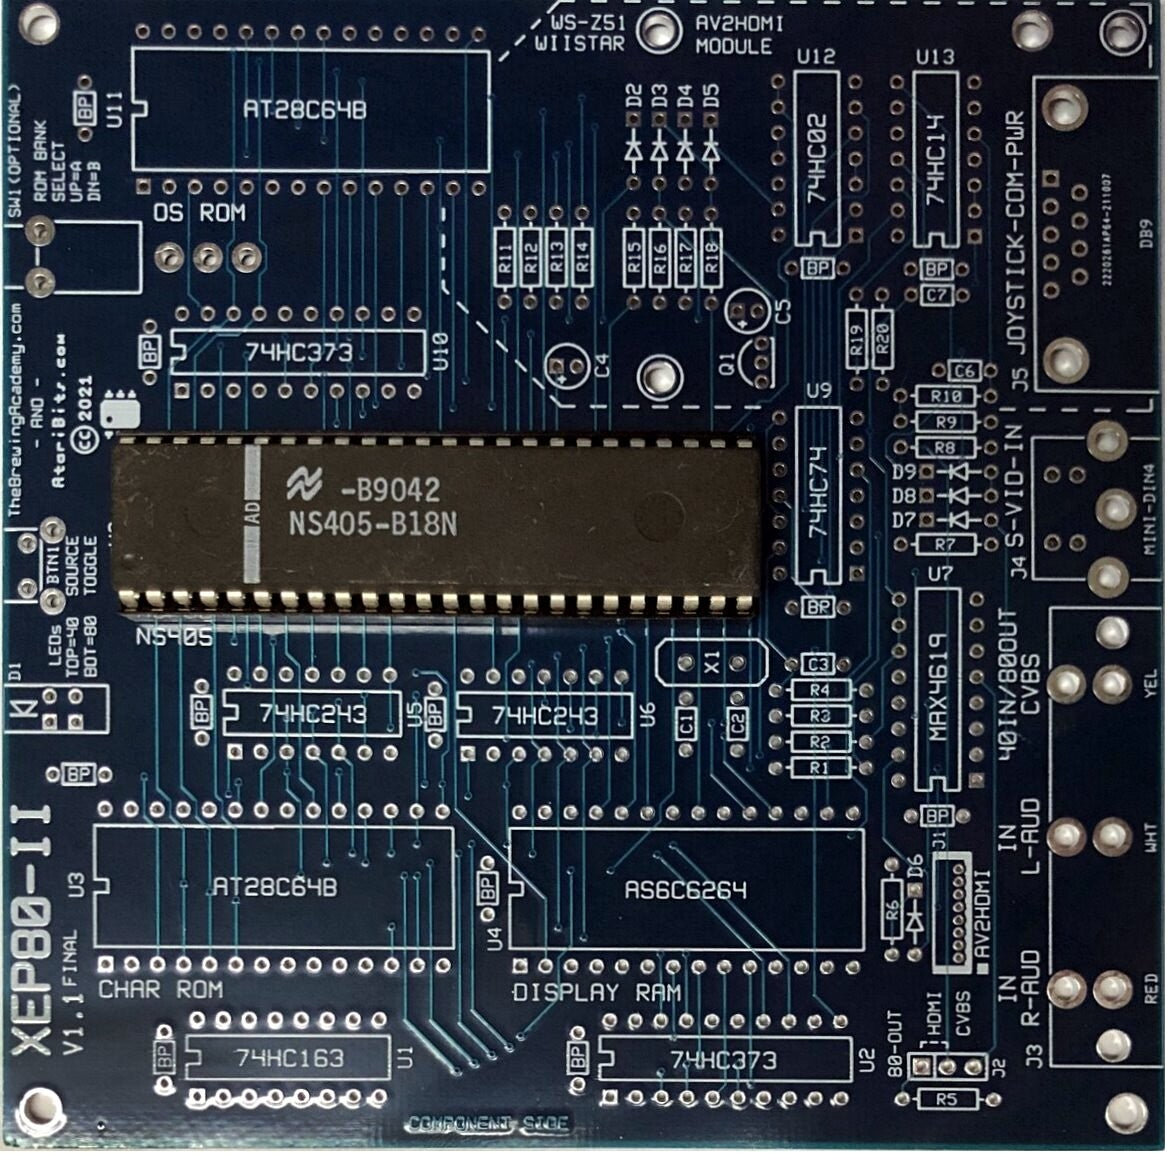
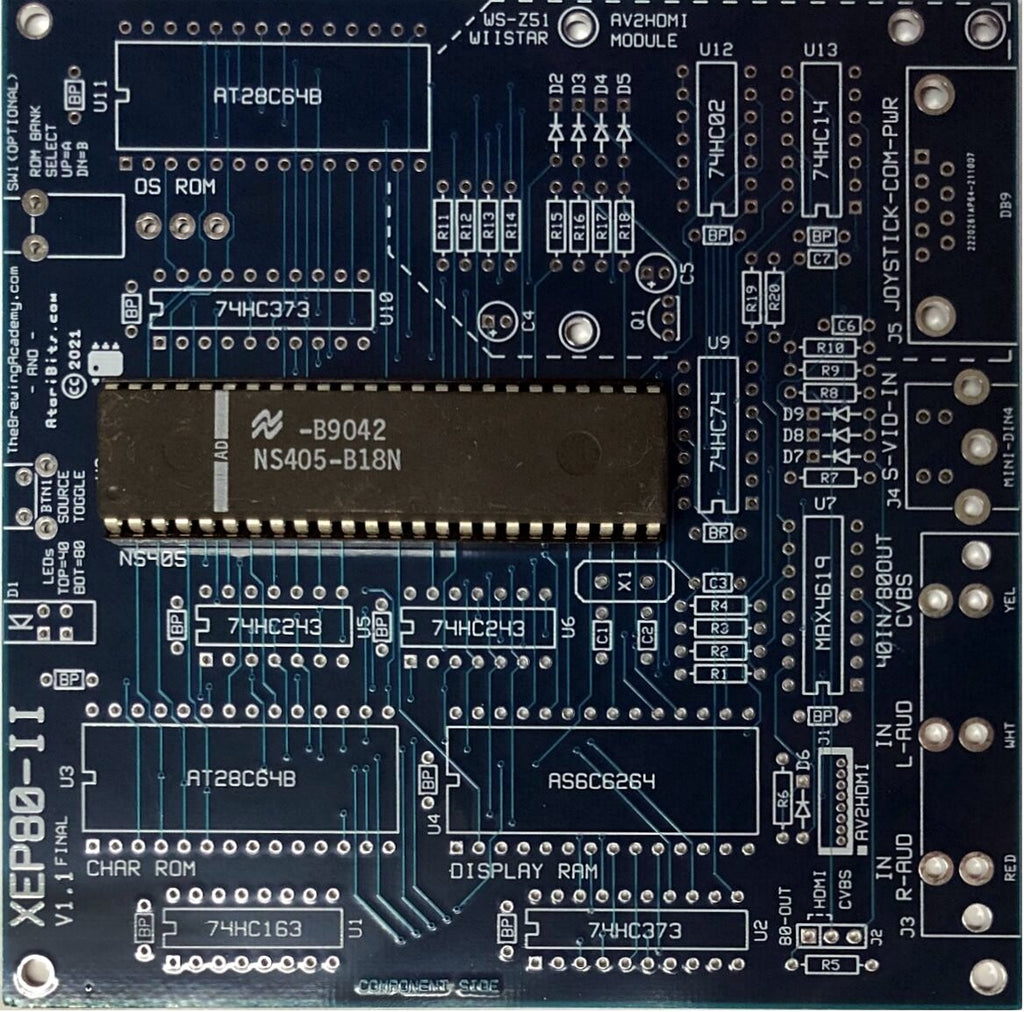
XEP80-II Main Board
A 4-Layer 1.6 mm thick board having mid layer power planes. Overall footprint: 4.5" x 4.5" (less than 1/2 the size of Atari's original XEP80). It's based on the 48-pin National NS405 Terminal Management Processor (TMP) IC to create the 80 column text display. Serial communication is via 2-wire transmit and receive pins, utilizing bit-banged joystick I/O pins as the interface to the Atari.
Support chips
The OS and Character ROMs are CMOS Microchip/Atmel AT28C64B-15PU 64Kbit EEPROMs, to be flashed with a TL866II Plus (or equivalent) programmer. Any 27C64 EPROM can be substituted, but will require erasure via UV light source.
The XEP80-II hardware is essentially the same as the original Atari XEP80 from a usability and communication standpoint, only lacking the parallel printer port of the former.
Basic Specs
XEP80-II Main Board
A 4-Layer 1.6 mm thick board having mid layer power planes. Overall footprint: 4.5" x 4.5" (less than 1/2 the size of Atari's original XEP80). It's based on the 48-pin National NS405 Terminal Management Processor (TMP) IC to create the 80 column text display. Serial communication is via 2-wire transmit and receive pins, utilizing bit-banged joystick I/O pins as the interface to the Atari.
Support chips
- 64K x 8 - OS ROM (4K selected, with 2 banks available)
- 64K x 8 - Character ROM
- 64K x 8 - Screen Display Memory
- Binary counter, data XCVRs, and octal latches, along with analog video processing to create a CVBS output
- On board analog video switching via Maxim 4619 IC chip to support WiiStar WS-Z51 AV-to-HDMI converter
The OS and Character ROMs are CMOS Microchip/Atmel AT28C64B-15PU 64Kbit EEPROMs, to be flashed with a TL866II Plus (or equivalent) programmer. Any 27C64 EPROM can be substituted, but will require erasure via UV light source.
The XEP80-II hardware is essentially the same as the original Atari XEP80 from a usability and communication standpoint, only lacking the parallel printer port of the former.
Basic Specs
- 80 character wide by 24-line text display (640 x 240 resolution)
- 15Khz CVBS output with HDMI option via Daughter Board
- NTSC (can do PAL same as original Atari XEP80 with a supporting driver)
- Works with any software that uses the E: device for screen output, assuming the 80 column driver is present
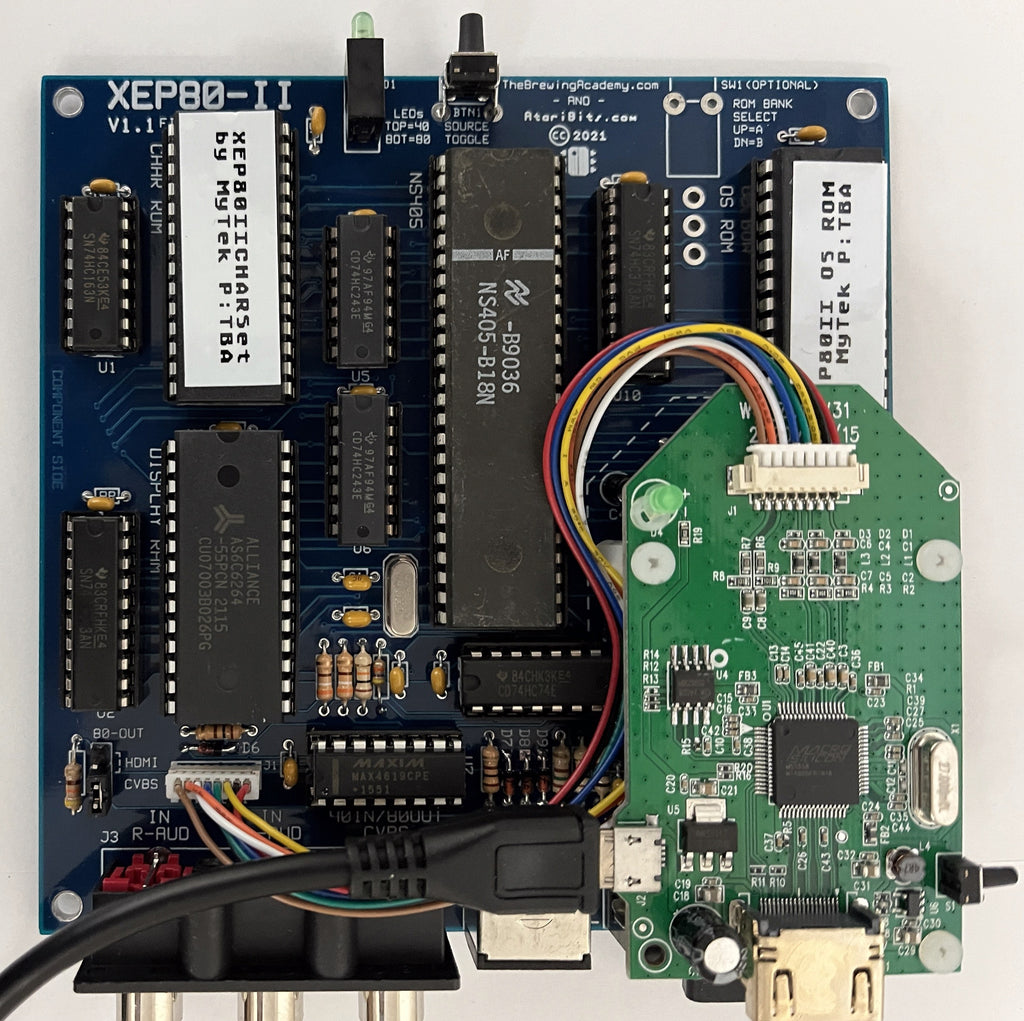
AV-to-HDMI Daughter Board
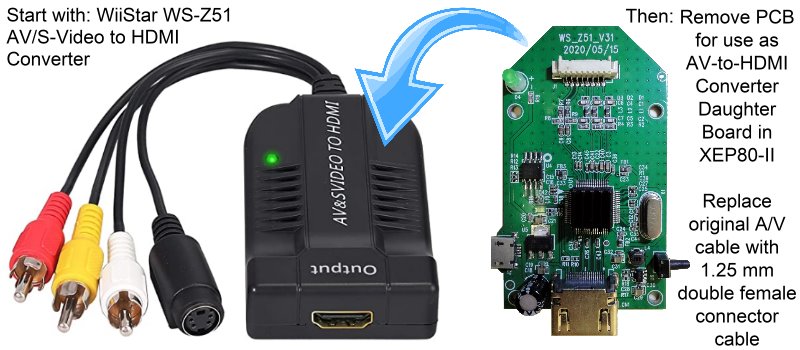
Although the XEP80-II Main Board is a new design brought to you by mytek, the WiiStar WS-Z51 AV-to-HDMI Daughter Board is not. This board is a 3rd party device that is disassembled to extract the actual PCB of interest. Disassembly is a simple process of separating the two pressed together halves of the plastic housing, and then removing the board found inside.
Although the XEP80-II Main Board is a new design brought to you by mytek, the WiiStar WS-Z51 AV-to-HDMI Daughter Board is not. This board is a 3rd party device that is disassembled to extract the actual PCB of interest. Disassembly is a simple process of separating the two pressed together halves of the plastic housing, and then removing the board found inside.
|
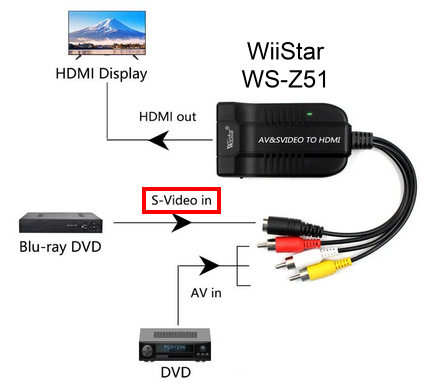
Using the provided AliExpress WiiStar WS-Z51 buy link above will get you the correct device. Be careful of other links on that same AliExpress landing page (also beware of Amazon or eBay) that look to be for the same device, albeit cheaper. Because many times they are pointing at an entirely different converter that will not work in this application. Usually they are missing the S-Video female Mini-DIN connection plug, and instead have a coaxial power connection in its place.
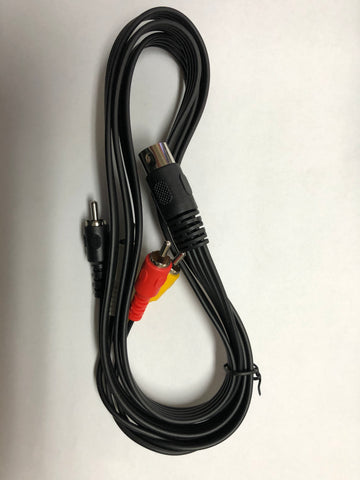
The original AV connection cable is no longer required, and will get replaced with a prefabricated double 1.25 mm female connector cable (select 8Position) to plug between this board and the XEP80-II Main Board. As a Daughter Board it gets mounted to the Main Board with three M2.5 x 16 mm threaded nylon standoffs and is fixed in place with M2.5 screws. Power for the converter is provided via Micro-USB either from a small USB power adapter, or from a USB port on the HDTV itself. |
The button shown on the right side of the HDMI converter board is dual function. Momentary presses step you through the HD resolution (720P/1080P), and sustained presses select aspect ratio (Wide, Full, 4:3). For our Atari systems it's recommended that the converter be set to 1080P with a 4:3 aspect ratio. Setup only needs to happen once, and those settings will be retained between power-ups.
Stock Atari Video to HDMI Conversion Quality
Something to be aware of, is that the method employed by the AV-to-HDMI converter when applied to the Atari stock 40 column color video stream is not perfect. For instance, there are a handful of programs that obtain a higher resolution image by Interlacing the video, such as what the infamous FlickerTerm program does. This method of increasing resolution will not survive the HDMI conversion process, and thus what should be a straight line in FlickerTerm will come out looking like this _-_-_-_-_-_-_ . Also at times there can be slight visual aberrations depending upon the colors in play, as well as which colors are directly next to each other. However in general the rendered HDMI image will usually be quite nice, and the aberrations where they do exist are relatively minor and will probably go unnoticed by many. So in other words, although the conversion is decent, don't expect to get the same exact results from this <$20 converter as you would with the $130 RetroTink Pro. But you can still expect that the <$20 converter will do an excellent job for very little cost. And to set your mind at ease, the dedicated 80 column text output quality is unaffected by any of these concerns, with the HDMI converter really making the 80 column video shine.
Something to be aware of, is that the method employed by the AV-to-HDMI converter when applied to the Atari stock 40 column color video stream is not perfect. For instance, there are a handful of programs that obtain a higher resolution image by Interlacing the video, such as what the infamous FlickerTerm program does. This method of increasing resolution will not survive the HDMI conversion process, and thus what should be a straight line in FlickerTerm will come out looking like this _-_-_-_-_-_-_ . Also at times there can be slight visual aberrations depending upon the colors in play, as well as which colors are directly next to each other. However in general the rendered HDMI image will usually be quite nice, and the aberrations where they do exist are relatively minor and will probably go unnoticed by many. So in other words, although the conversion is decent, don't expect to get the same exact results from this <$20 converter as you would with the $130 RetroTink Pro. But you can still expect that the <$20 converter will do an excellent job for very little cost. And to set your mind at ease, the dedicated 80 column text output quality is unaffected by any of these concerns, with the HDMI converter really making the 80 column video shine.
PAL Operation
The XEP80-II and the software supplied in the download section below, is designed to be used in conjunction with an NTSC based Atari 8-bit computer system. When used in PAL mode, the AV-to-HDMI conversion doesn't seem to be of the same quality as the NTSC results, and the Altirra Ultra Speed driver for PAL doesn't quite work as well on the real hardware vs. emulation. However just like the original XEP80, this board can still be used in a PAL system, albeit will require a new driver and PAL display timing parameters to be loaded from disk. Presently this aspect won't be provided from this website, so if the user wants PAL operation they will have to come up with a solution on their own, same as if it were a stock Atari XEP80. And since this appears to be more of a software than hardware issue, a future fix will likely be forthcoming.
The XEP80-II and the software supplied in the download section below, is designed to be used in conjunction with an NTSC based Atari 8-bit computer system. When used in PAL mode, the AV-to-HDMI conversion doesn't seem to be of the same quality as the NTSC results, and the Altirra Ultra Speed driver for PAL doesn't quite work as well on the real hardware vs. emulation. However just like the original XEP80, this board can still be used in a PAL system, albeit will require a new driver and PAL display timing parameters to be loaded from disk. Presently this aspect won't be provided from this website, so if the user wants PAL operation they will have to come up with a solution on their own, same as if it were a stock Atari XEP80. And since this appears to be more of a software than hardware issue, a future fix will likely be forthcoming.